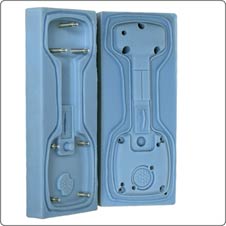
Epoxy molds are reasonably fast in comparison to machined molds and are a relatively inexpensive way to create prototypes. A high strength mold can be achieved within a few weeks with a master pattern or rapid prototype. Epoxy molds are not as forgiving as RTV molds meaning that any undercuts will require slides similar to injection molded tooling.
The following steps are required to make an epoxy mold:
- Create a pattern, as with castable silicones, these epoxy resins will reproduce surface detail and textures exactly. Therefore the patter is finished to the desired quality before making the mold.
- Typically, an interim RTV mold will be made in order to create a urethane reproduction for the epoxy process. This is done because the master is usually destroyed in the epoxy molding process.
- The parting lines are established in much the same way we would make an RTV tool.
- The epoxy is applied to one part of the mold at a time and then goes through a multilevel post curing process. The post curing is where the high strength is achieved.
- At this time, the mold is machined in order to have parallel mating surfaces and any gates and vents that could not be molded in are applied. Often, intricate core detail will be added in with a machined aluminum or steel insert.
- Curing time is dependent on the product and curing agent. Curing times range from 30 minutes to over 40 hours. Adding heat will speed up the curing process significantly. Aging the mold at room temperature for up to 72 hours, if possible, will increase the productive life of the mold.
- Properties of epoxy such as compression strength and hardness vary considerably from product to product. Choosing the proper epoxy for a particular design is based on experience and manufacturer�s recommendations. The most important consideration is the intended production material.


